Google Search

Saturday, December 10, 2011

Another Watsons Buy

The other day I was strolling around the mall looking for food to take home and I pass by Forever21's boutique. I didn't bother to take a peek because I know my wallet will die lol. So yeah, I took a detour and ended up in Watsons instead. And since I really wanted to try that Maybelline Baby Lips Lip balm, I decided to go inside and look for it. Maybelline's counter was filled with girls looking for this and that so I went to have a look at Revlon. When I came back the evil ones are still there, blocking my way so I cant see what's on the counter. So I just asked the girl on the counter if they have it, and she said they are out of stock. Tsss I really wanted to try it but its always out of stock.

Bad luck :| So I again wandered around and went to the Face stall and looked for facial washes, masks, toners, etc that I can try. I have been standing there for like minutes and manage to pick up only two items haha. Take a look at what I bought :p


Although I am loving my St. Ives Apricot Scrub and Etude House Happy Tea Time Cleansing Foam, I am still on the quest of finding the so called "Holy Grail" facial wash, so I picked up Clean and Clear's Active Clear Acne Clearing Cleanser. It was priced at $1.89 for a 50g tube, something I can easily afford :p  And next to it were toners, so I also had a look and found Celeteque's Acne Solutions Oil Control Toner. I am thinking that this might work best with the the Clean and Clear facial wash so I grabbed it too. I think this small bottle cost only $1.75 :)


According to the label, this facial wash is oil free and won't clog your pores, so I am just hoping for the best. My face is really oily, especially with our super efin hot weather, so I really need something to make my face look normal haha.


I have read good stuffs about Celeteque So I really have high hopes for this toner. Although I am not really expecting for it to be able to control the oil on my face, at least I am expecting to see results like cleaner pores and fresher face. Its an oil control toner so it better do its job, else I'll burn this bottle lol.


It's got chamomile and aloe vera, hmm I wonder how good those stuffs can be? Better google it to know.


I am already starting to use this two products this week, and I hope that they work out perfectly as a combo. I am really loving Clean and Clear's Facial Wash because it smells so nice :)

P.S. If in case you are wondering as to why my photos have this resolution, I am only using my phone's camera because my mother has the cam. So that would explain the not so nice resolution of the photos, but hey I think its pretty decent. Also, I already bought a new cellphone and I am quite happy with it. Been downloading apps especially for photo effects haha lol. Do you know any good apps for free that I can play with? I love taking photos and adding stuffs so it would really be nice if there are some sort of photo editing apps out there. Thanks :)

Thursday, December 8, 2011

Review: iWhite Korea Whitening Pack Peel Off Mask

Hi guys :) I'm back again with another product review to share. Today is December 8, the Feast of Immaculate Conception of Mary (today is our baranggay fiesta hehe). Also a quick reminder, my BH Cosmetics Giveaway ends on the 10th so please keep your entries coming.

So today, I am going to blog about a whitening peel off mask that I have been using for quite some time. It's called iWhite Korea Whitening Pack. I'm not sure if this is a korean beauty product but since the label says Korea so it might be :3 I bought this one months ago for almost $1 for two sachets. My 1st pack still isnt fully consumed because I dont use that large amount on every application.


Packaging
The product comes in a white sachet, which for me is nice because it looks clean. It might be simple for others but sometimes less is better, so I can say that I like how this product was packed.

What the Product Claims
According to the label, this is supposed to revitalize, cleanse and enhance our skin after use. Hmm want to know if these were achieved? Continue reading pls :)


Directions for Use
Wash your face first (any facial wash will do), rinse well and pat dry. Apply an ample amount of iWhite Whitening pack on your face, avoiding the areas like the eyes, nose and mouth. Wait for about 15 minutes or until the mask has dried then gently peel it off. Start form the chin going upward.


The pack might look big, but actually there's just enough contents for 3-4 uses. This is how mine looked liked after cutting the plastic in half. I think I'm down to my last application as there's only little left.


The product is white in color, has a faint smell which I dont mind coz it doesn't bother me at all and is quite sticky. So to avoid wasting it, apply it immediately on your face because it can dry quite fast and might not stick to your face anymore.


Apply it evenly on your face, just like how I did mine. Lol it was hard for me to cover my face properly because the mask was sticking on my fingers and not on my skin XD


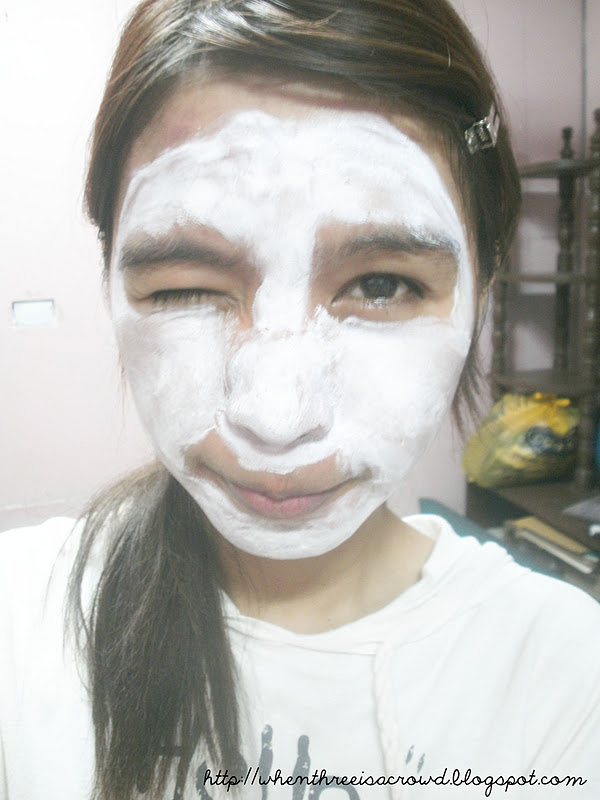
But after a while, I managed to cover enough of my face, and here's how it looked on me. Haha I know this is not a good photo but oh well, better than nothing :)


While waiting for the mask to dry, I was taking photos of myself. I think I look better with the mask on? HAHAHAHA


I was touching one side of my face to check if its already dry, but eeek! My fingers got stuck to my face :|


The mask wasn't completely dry when I touched it. I tried to pull my finger without damaging the mask but I failed. So guys, better make sure that its completely dry before touching...


It left a hole right there :D hehe So yeah since it was already dry, I started peeling it off. And let me tell you, this little devil sticks like there's no tomorrow. Seriously, it isn't like what you see on TV wherein you pick at one side and start peeling and everything else comes off smoothly. I had a hard time with this as the mask keeps on breaking so I have to start peeling again. And there were some parts where it was really hard to peel so my face ended up like a patch. Lol I just had to resort to washing my face with water to completely remove the mask. And the result?

My Review
I can't see anything that would mean it has revitalized my skin. I don't see any changes as of the moment, but of course such things dont happen in just a few seconds right? But one thing that I like was my skin felt cleaner and tighter. I also felt fresh and my pores were cleaned. I didn't became white instantly of course, but a few areas of my face lightened after 3 uses, so maybe thats a good thing already.

Although this is cheap, I don't think I'll buy this product again. I had a hard time removing it and the cheapness won't compensate for that. I might just find another peel off mask to use that is easier to work with, just like the one from Garnier.

Wednesday, December 7, 2011

DIY Home Made Oat Facial Scrub/Mask

Finally, I have tried the Home Made Oat Facial Scrub/Mask that I have been seeing all around YouTube and some blogger friends. It was a very fun and nice experience and I would like to share it to you guys. Hope you will learn something from this post =)

First, you must get hold of a pack of oats. Actually you will only need a small amount hehe. In this post I am using a brand of oats that I found on our local supermarket. It was very cheap and I got a lot of oats already. So yeah, I kept the rest because I plan to do this everyday to see if there will be any noticeable changes or whatever.


Okay to start, grab an ample amount of oats and place it in your palm, just like the photo shown below. There's no measurement as to how much or how many, but you can just decide on that part.


Pour water on your hands. You can do it by closing your palms in a fist like position and let the water from the faucet run down and enter your hands through the hole between your thumb and pointer finger, like the photo shown below.


Or you can also do it by just opening your palms and sprinkle droplets of water on the oats. I figured this is easier for me because I am in control of the amount of water, and I dont get that much oat wasted because of the running water lol.


During the procedure, slightly press on your hands on the oats to make it softer. And then repeat the same steps of adding water to the oats to soften it even more.


After a while you will see that instead of a clear liquid, the oat will produce a milky-ish liquid. I don't know if it helps but I used this on my face before I applied the oats, kinda like a toner or something. And mind you, it feels so nice on my skin :)


So after you have soften the oats with water, you are now ready to start scrubbing on your face =) Let this be a warning though; it can be quite messy as the oats tend to fall so make sure that you are in an open area so that you can clean the mess easily.


Scrubbing removes the impurities and dead skin cells, plus I am hoping it will remove the flaking on my skin too because I am currently peeling because of something that I am using.


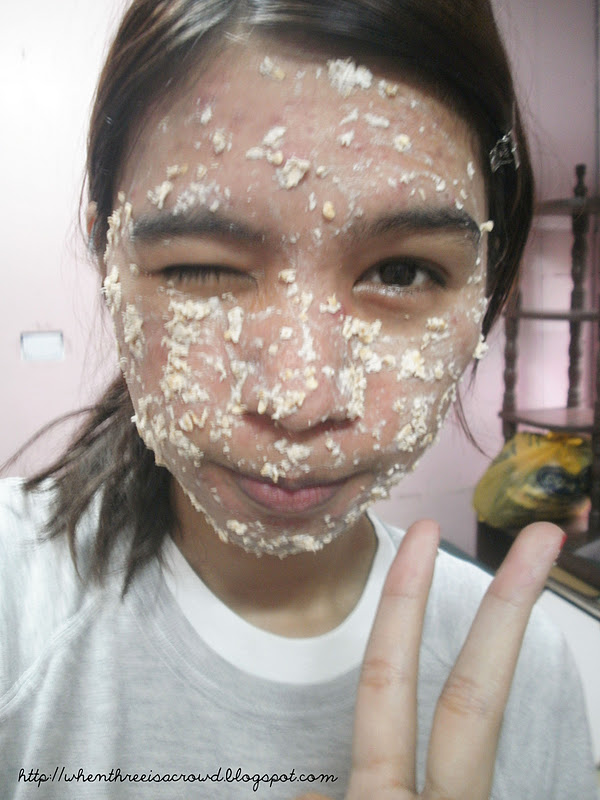
Supposedly this was for a facial scrub only, but I find the feeling of having oats on my face a nice and refreshing one so I thought of using it as a mask instead. Seeing how well they stuck to my face, I applied the rest of the wet oats on my face, and voilah~ instant face mask :D Oats does not smell like perfume or anything but its not that bad either. I dont know how to describe it but it reminds me of a rice granary or a place with so many rice and corn  lol. Anyways, here are two photos of me cam-whoring with the oats on my face.

Hi kids, this is the oat monster


After a few minutes, I started to feel that the oats have dried up so I washed my face already. The oats really stuck that much I had to scrub a little because they have dried up. After washing my face with water I felt refreshed and my skin felt clean too. Definitely I am impressed with this oat thingie. And because of this discovery, I am now going to do this every morning :)

So you see it was quite easy right? Plus not to mention its a healthy and safe way of cleansing your face because you are using natural ingredients. Oats has a lot of good benefits, you can Google it to check :3 I think this is a good way of letting my face rest from all the facial washes that I am using. I hope you guys get to try this one too because its really a nice routine, especially in the morning.

Sunday, December 4, 2011

New Stuffs Bought

Its already December but I can't feel it because I am so broke, and even on my smallest and basic needs I have to rely on le parents for money haha. Anyways we went to a trip to the mall last week and I managed to grab a few stuffs ang place them together with my mom's purchases, making her pay for it all lol.


Actually I have no plans of buying anything because like I said I have no money. But since I have been hearing good things about the Asian Secrets Lulur Body Scrub, I told myself I have to have it, right now. And so I did.

I also bought a whitening lotion in the hopes of making my skin go back to normal because the evil sun destroyed it. Ahh I'm so sad because of that dark spot on my left leg. I should have listened when they said the sun is harmful. Damn sun i hate you so much right now. I also grabbed a small pack of Garnier Light Gentle Clarifying Foam for me to use. I have this little experiment with my facial washes that I hope will work out, and I'll share it to you guys soon :)


I thought that would be the end, but turns out its only the beginning hehe. I missed eating Peanut Kisses so I also grabbed a small pack when we passed by the food section. Its very cheap only so I know my mother won't mind :p


And lastly, a small pack of oats~ I won't eat this lol I don't eat this stuff. I bought this so that I could try doing a home made oats facial scrub. I have seen lots of tutorials on YouTube and its so easy to do, trust me. I am so excited to try it out too :)


And that's the end of this let-my-mother-pay-for-this haul =) Have a nice weekend ahead.

Saturday, December 3, 2011

You Lace Me Up {NOTD + Tutorial} and a Review of the Elegant Lace Style Stickers from Born Pretty Store

Hello everyone! Its officially December, which also means that I turned a year older because last Friday was my birthday :) I was supposed to blog back then but I was really not in the mood and so I am only able to post again today.

And so I am now going to share to you something that I did this afternoon. I was feeling so sad and uninspired because someone's not texting me since yesterday and the thought of it is killing me lol. So yeah, I had to vent it on my poor nails :p Here's an NOTD plus a mini tutorial on how I did my current nails. I hope you enjoy it :)

Okay so first, Id like to show to you the items/materials I used in this simple but very nice NOTD. I recently bought a pack of Elegant Lace Style Stickers from Born Pretty Store. It retails for only $1.52 and contains 3 different styles which is good for using once on both nails, unless of course you plan to recycle the stickers ;p

[credits] Photo from Born Pretty Store
Price:  $1.52
Professional for using on Acrylic False Nails / Gel Nails / Artificial Nails / Natural Nails
Suitable for Professional Salon use or home use

And here's how it looked like when I opened the plastic. As you can see the design is pretty much the same as the photo on the site, so I have no complaints as to that thing.


Also, an instruction can be found at the back of the pack, but if you don't understand the instructions that came with it then I'll just enumerate it in simpler words :)


Instructions:
1] Clean first the surface of your nails where you'll be sticking the stickers.
2] Choose the style of the sticker that you want to use and carefully stick it onto your nails.
3] You can blow on the stickers to make it dry and stick properly on the nails.
4] To remove, you can rub on the stickers or use baby oil and alcohol to remove it faster.

Before the tutorial, I'd like to give a brief review about the Lace Stickers that I bought. I got it for a very reasonable price, and I am happy with that. I also got enough for the price so its really worth the price I paid. It was easy to use and easy to remove, so no problems there too. Overall I am happy that I bought it because its such a nice product.

~What I Like~
* easy to use and peel of the protective covering
* affordable, worth the amount i paid
* lots of designs to choose from

~What I Don't Like~
* fragile, can be torn and ripped easily if not carefully removed from plastic.

Repurchase? YES of course!

And now that you know already how to use it, its time to start the job. To make things easier for me, I cut the stickers into strips so that it will be easier to remove from the plastic covering.


And for today's nails, I will be using this design. I chose it because I find it cute and the design reminds me of crowns :p Also I like the little floral-ish detail of the lace.


And after debating about the color of the nail polish I'll use, I finally came down to a decision; Red. I was really planning on the black one but since my last NOTD was also black, I decided to use another one, and red seems like the only nail polish color in my little stash that would go nice against white.


And so off I painted my nails with rrrrred :) I used two coats so that it will be truly red, and I love the result. Who would have thought that this uber cheap nail polish from somewhere in China would give out such a nice result? Nice :D


So okay after painting your nails in your preferred color, its time to start sticking. There's no rules or instruction on this one really because we all know how to stick stickers right? But we just have to bear in mind that we have to be careful in sticking the stickers because if we make a mistake its going to be ruined and you'll have to start again.

Here are some tips though; Make sure that your nail polish is already dry to avoid damaging it when sticking. Measure enough size of the sticker that you will stick on each nail to avoid wasting stickers. Shortage of stickers for the nails can be easily remedied by cutting another piece to stick. Start sticking at the one end of the nail and gently tap or press it on the nails to ensure it sticks properly.


And after a few minutes of cutting, sticking and pressing, here's the finished product :) Forgive me if I'm going to spam you with photos but I am just so happy about the results. In my opinion its really pretty and elegant haha :p


Although its already enough for me, I still felt like its missing something so I decided to add a few details with the help of rhinestones. You can also purchase this 12 Colors 2mm Rhinestone from Born Pretty Store still for only $3.88. There's a lot in the wheel, so its surely worth the $$$ I'm telling you.


I just kept the details simple by adding rhinestones on the top part of the lace. I choose the color green because uhm its Christmas, and red and green is the color of Christmas. Also because green is my favorite color haha. And after a few hardships at picking and sticking the rhinestones I managed to put them on my nails and here's the final result :) Another nail spam~


It really looks like something Christmas-ish haha lol. And I am very happy and proud of myself for coming up with such simple but very nice nail art. At least in my opinion its nice and cute though :p

I hope you enjoyed my nails and learned something from the tutorial :) Also, if you plan to buy stuffs from Born Pretty Store, don't forget to use the coupon code JELL73 to get an extra 10% OFF your purchases. Plus, all items are frees hipping with no minimum orders! So hurry up guys and start buying whats on your wish list before the Holiday starts :)


Disclaimer: This is not a sponsored post. All opinions expressed here are mine and are 100% honest. Items used were either bought using my own money or given as a promotional gift but it did not affect in any way my opinions.